An offer where you just pay postage £5.65 and then they give you a £5 voucher to spend on anything else! So you effectively spend 65 pence on 48 plants that will fill your garden every year!!
48 perennial plants!!
Uk only I’m afraid!
link to offer!
A contrast bathroom sink before and after
So much better having painted the walls and tiles and replaced the taps (from the Carboot for £1.50!!)


Old butler sink
Turned to planter – the little pots surround look old but were actually from the £1 shop!
So there’s lavender, bergamot and flowers such as pot marigold in there – imagine this brimming with colour and flowers!
Thinking about a small creeper inbetween the bricks as I really like the forget me nots around the back- what do you think?


Outdoor toys
Yesterday I painted my kids outdoor toys to match and look like a set.
Excuse the windows everywhere – we’re building a conservatory!
The last photo is what they looked like before – you can just see the hot pink of the seesaw and the mismatch of the slide etc. I used normal paint (tester pots) and clear varnish as well as plastikote spray paint. The whole lot cost roughly £15 as all of the toys were free! much less than buying new kids stuff! I’m really pleased with the result! (The house needs a second coat!)


Upvc door re do
Here’s my crappy white cheap looking upvc front door

I wanted it to look like one of those new composite lovely doors. So I painted it! I used rustoleum black gloss paint for wood metal and plastic and… Ta da!


I’ve used hammerite in the past for similar projects but you need special thinners, it stinks and takes bloody ages to dry. This paint however was dry within 30 minutes (more like 12) and washed off the brush with water. I did a scratch test and it didn’t move at all! Also no smell = no headache!
Woo paint upvc!
Today I finally finished my pom pom rug!
Just used a rug backer (anti slip) and hot glued my pom poms to it – simples!


From drab to fab!
Started off with this paper lantern

Then cut up my daughters baby clothes and turned it into a rag globe.
It’ll look fab in my daughters bedroom and so many memories as I look up.


How To Create Free Art To Match The Room
In our bedroom we decided to go with a green striped wallpaper (I would’ve gone more floral but my husband wanted a cleaner lined look). we compromised and found a wallpaper we both liked.
We wanted some art but we found it very hard to find art that complimented the stripes. We found lots that we loved but it just seemed to clash.
I decided to use an off cut of the wallpaper and create our own art work .
I used frames I had already and just put the wallpaper in as a backing then cut the shapes you want (in our case our first initials) then I used cardboard glued to the back of the letters to make them stand up from the frame. I discarded the glass as I wanted a 3D look. Here’s the process in pictures:


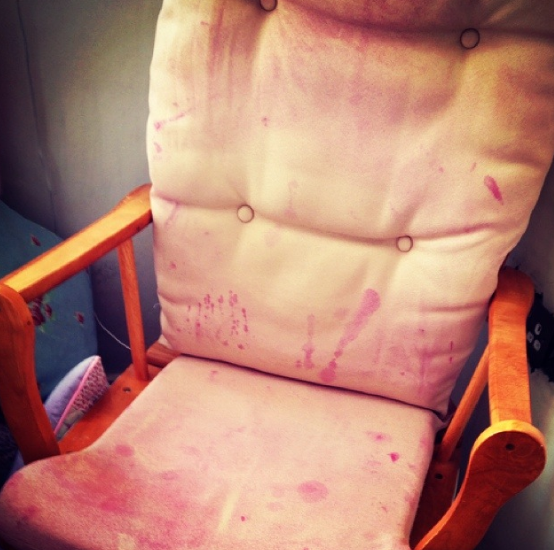
Chair makeover #2
It’s that chair again… It’s moved so obviously it needed updating!
A reminder of how it was originally:
We updated it to go in our daughters nursery but now we don’t need a feeding chair in there as we mostly sit on the ends/ edges of beds and the floor to read stories so we’ve relocated our beloved chair to our bedroom. (hurrah! I can have a chairdrobe instead of a floordrobe…!)
This time I also painted the wood work. I decided to use cuprinol because it’s outdoor paint so can withstand any scrubbing necessary. (I’m not sponsored by them but if they’d like to sponsor me I’m more than up for that – I could endorse cuprinol until the cows came home. Love the stuff.)
I also changed the fabric (again using my glue gun). I used the same fabric that I used for the lampshades (also a previous blog post if you fancy a gander) it’s nice that they coordinate but I think that’ll be the last time I use that fabric in the bedroom as I don’t want it to look matchy matchy.
I still have some of it though (a pair of old curtains go a long way!) so you might see it in another room/project yet!
This project cost £0 as I already had the paint and fabric.
Here it is now:

Moving into a ‘doer upper ‘
Hello all,
Sorry for the absence but what with one thing and another with the charity work I do and general manic family life I just haven’t had the time to blog. I’m hopefully back on it now though!
I wanted to give you my top tips for moving house into a house that needs work doing to it after a friend asked me whether she should consider doing similar. We moved into our house 2 years ago and we ‘re no where near finished even though it’s only a 3 bedroom end of terrace (can I blame manic family life again ?!)
My top tip after moving into a house that needed improvements is to do it one. room. at. a. time. It’s very exciting especially if it’s your first house that you can splash colour on the wall that you’ve chosen and not have to work with magnolia landlord approved!
When in that room that you’ve chosen to decorate first go in this order:
Ceilings, walls, floors, furniture, accessories. (Then when your husband spills a whole can of gloss paint on the floor it doesn’t matter as you’re replacing that carpet anyway…)
You can often find though that one accessory can provide the inspiration to do the whole room such as my bathroom, I chose the colour and tiles etc based on a candle votive I liked! (Must get around to actually putting the tiles up.)
It’s useful to live in a house a bit first to get the feel of it and to see how the light falls at different times of the year. I would suggest painting the whole house white/ cream and going from there with colour. A mistake I made was I painted the walls in the winter in my living room what looked to be a latte colour. Once summer came the lighting changed and it had very pink tones which didn’t match the rest of the decor.
So paint the whole house a neutral colour then live in it a bit collecting accessories and ideas. Put those ideas Into action but start with one room and finish it completely.
I made the mistake of doing bits of rooms here and there and 2 years later there are still rooms half finished ![]() my New Years resolution is to finish projects! (I’m working on it.)
my New Years resolution is to finish projects! (I’m working on it.)
